Monday, April 13, 2020

Week 8 Models

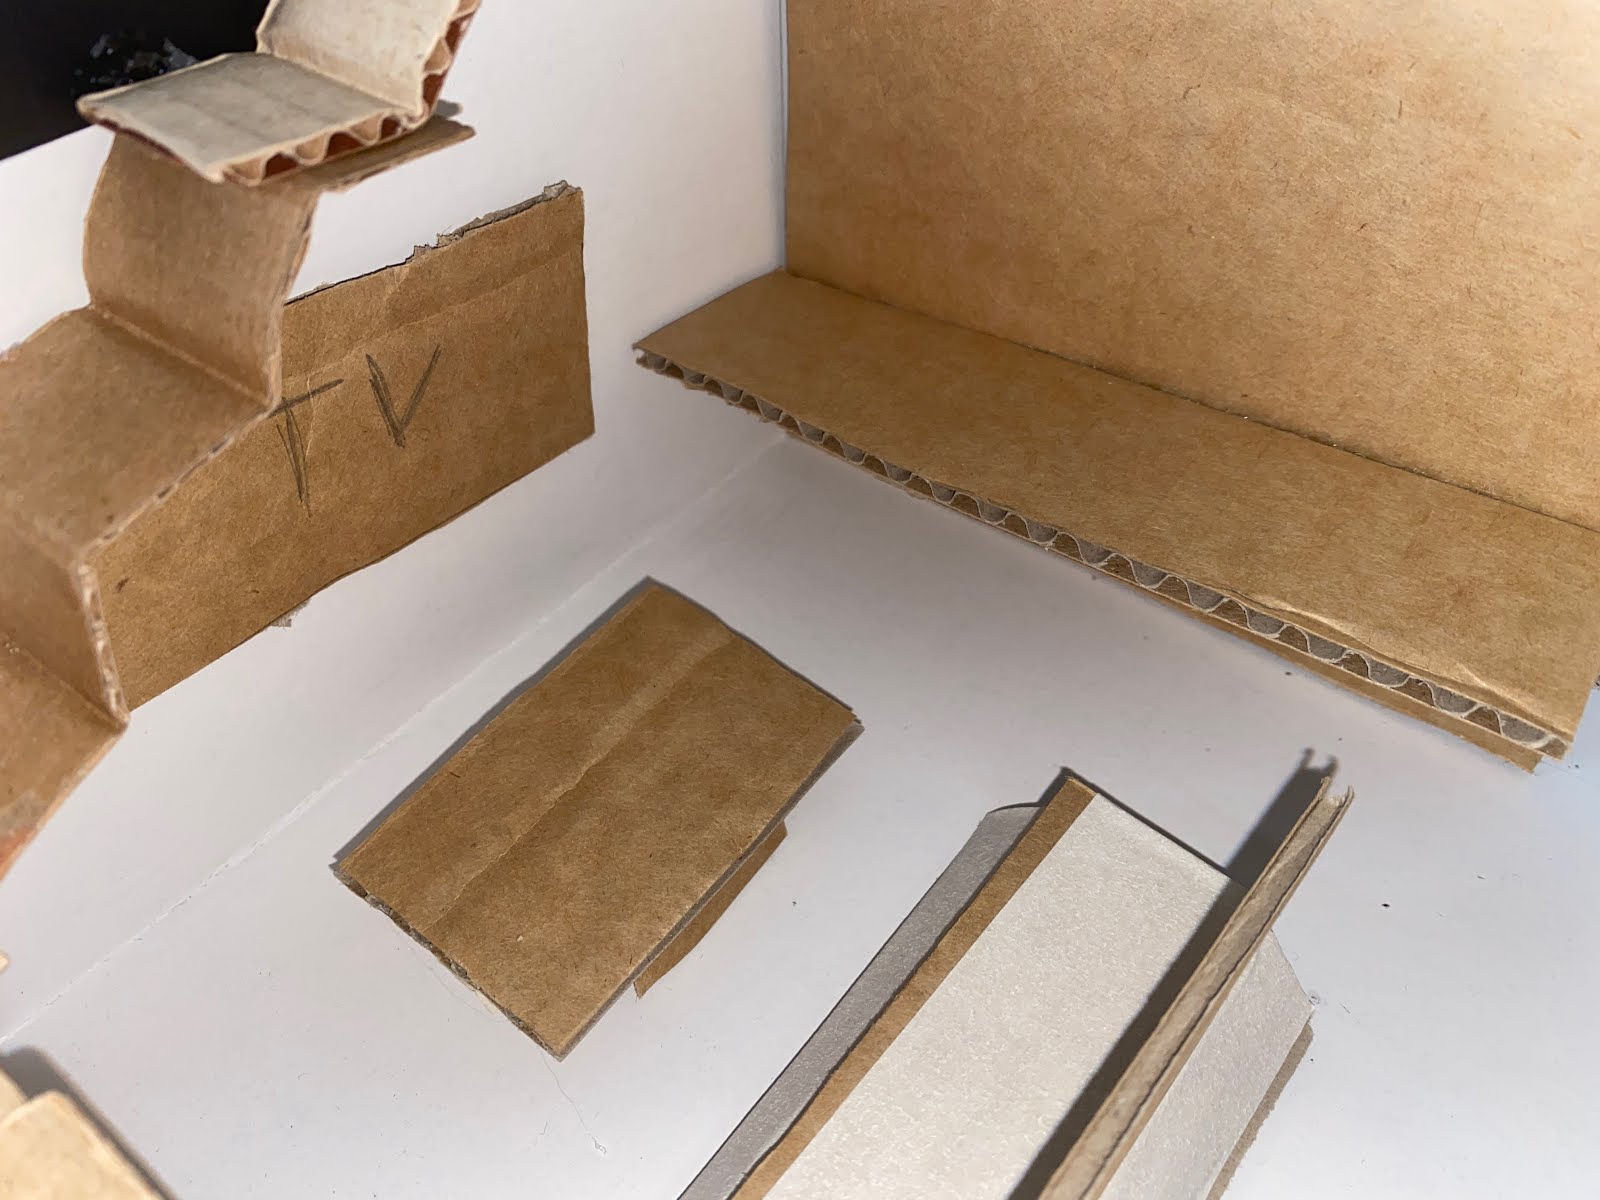
This week, I made a new model at a 1:18 ratio using cardboard. This model incorporates a revised study room at the back of the model, with a bed, and TV. The windows in this room were changed, from being one large window to two smaller windows, allowing more control over which parts of the room light can enter into. I then added a second room to the side, a living room.

^A bench-top for food prep, couch, coffee table and TV. Forming a living room. The model also has shelving on the left, that went along side the wall.


Following the advice from my tutor, I added a second level to this model, with additional features that I'd like in my study space. I used this opportunity to install a void over the living space, with a larger window on the second story frontage. This larger window provides a "skylight" into the rooms, as the void opens the living space to light, as well as the "Infinity Spa" on the second level, with another large window on the other-side of the room, flooding the room with light. This room is ideal for physical exercise, or relaxing in the Spa.




Week 8 Materials and Fusion360

This week I applied a range of materials onto my digital Fusion 360 models of my initials. I wanted something bright, vibrant and reflective of me.

As seen below, the exterior colour is a light blue with a warm light sheen. I applied warm lighting as it has a warm, inviting feel. Reflective of a summer day, or late spring afternoon with dusk like lighting. The light blue is my favourite colour. Reminds me of the water, and clear skies on warm summer days.
The interior of the 3D shape consists of my second favourite colour, Gold, which is on the bottom layer, as well as a titanium finish on the sides. The Gold is again a warmer colour, but also highly reflective and provides some contrast between the blue.
The titanium finish on the sides was a tough decision, as I weighed up between a rough white leather finish, or a smooth marble or metal sheet feel. I chose titanium as it gives more definitive shape to the A and P, as well as shows the A at the front due to the high contrast. 


Week 7 3D Initials using Fusion

This week, I created 3D shapes using Fusion 360 using my initials (A, M and P). I thoroughly enjoyed this activity as I was able to be creative with the types of styles and shapes I could do with the A and M letters in particular. I incorporated the A and M into the front of the shape, to have a combined feel, with the shape moving outwards, before coming back in towards the back to create the P shape.

The exterior curve of the 3D shape was inspired by Heydar Aliyev Cultural Centre in Azerbaijan, where architect Zaha Hadid has used a multitude of curves to construct a visually stunning building.


Tuesday, April 7, 2020

Week 7 Fusion 360 3D Models

This week in Fusion, I created the physical model I made this week (See Week 7 Models), in Fusion 360. These models have been added with a larger north side window, which based on my house's orientation, will provide much more direct sunlight in Winter, and more dispersed sunlight in summer.


I then added 2 more 3D rectangular prisms to create the ideal study space. With an extra window on one of the extruded sections, it provides extensive space, that isn't just a simple rectangle, but with an intersection to spread out.


Monday, April 6, 2020

Week 7 Models

This week I worked on a 1:10 scale. I wasn't overly happy with the way the physical model turned out, however it is slightly smaller then my study space, and is much simpler, with a larger window, which is what i ideally want in my room.


The difference between this model and the previous, 1:30 models, is the content within the room, and the size. A larger window on the west side provides more light in the morning, and less light in the late afternoon. 

This model was the smallest of all the 3D models made, in terms of actual room space. Has a more cozy and relaxing feel, rather then stressful, work feel.


Saturday, April 4, 2020

Week 5 Laser Cut Model Images

This week, I made my study space in 2.5D from in Fusion 360. The process was fairly simple, however I did have complications when converting to Illustrator to prepare for Laser Cutting, where the lines were overlapping. I overcame this issue by going back to fusion, and further separating the shapes, and conducting some minor alterations in Illustrator to ensure the red lines to be cut were representative of the shape of my study space.

Pre Illustrator Layout

Illustrator Adjustments

Fusion 360 2.5D Models


Wednesday, April 1, 2020

Week 5 Model Making

This week, I made an all paper 1:30 scale of my study space. The first model was made out of paper (see below). Including all furniture in the room.

This room is without any "desired" alterations. 
I had difficult creating the furniture, as they're quite small. So I made simple shapes to resemble where everything belongs. 

I further refined this model using a range of materials, particularly cardboard (See below).
The light gray cardboard along the long side of the room is meant to represent a blue feature wall that is present in my room. I also adjusted the wardrobe to be a freestanding, open wardrobe, rather than built in, as I did not like the side blocking the door.